Some cards are born from a single idea and finished in an afternoon. Others come together during a big creative weekend, tucked in among a dozen other projects, and only get their proper introduction later. This Boutique Blossoms Thank You card is one of the latter — and I think it’s about time it had the spotlight to itself.
There’s no fancy fold on this one. What gives it presence instead is layering — building height and depth through foam adhesive and foiled die cuts, so the card has real dimension even sitting flat on a table.
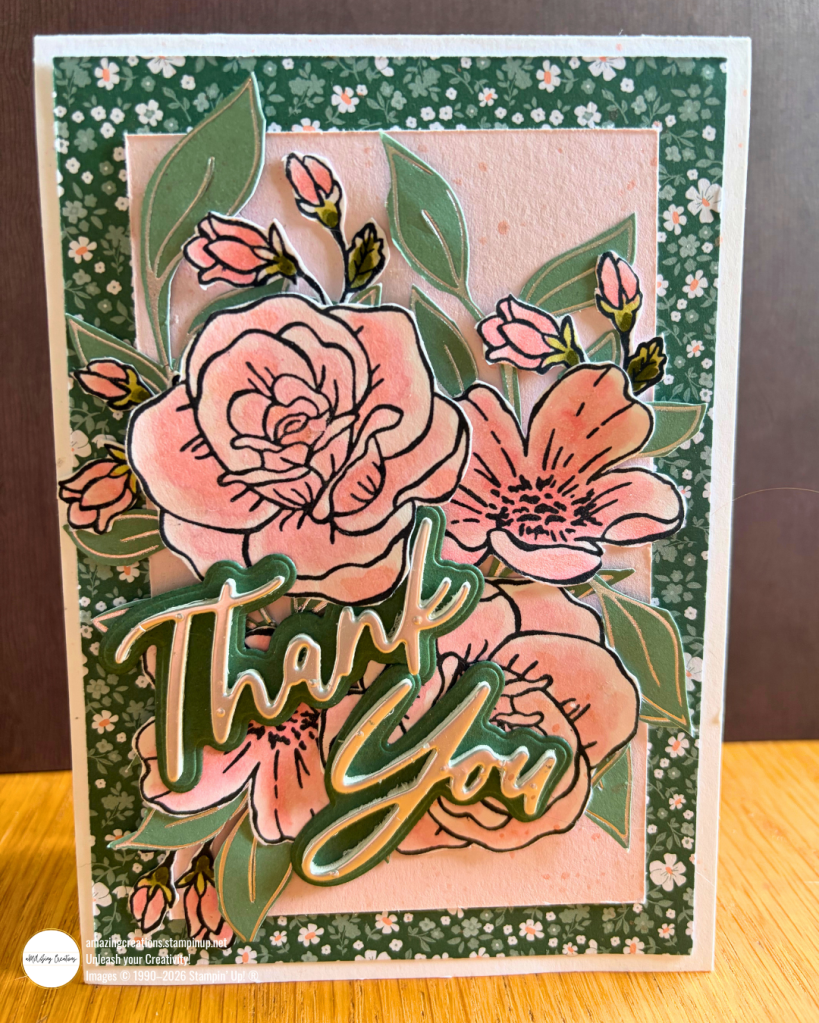
The Boutique Blossoms Thank You Card, Layer by Layer
The Base
The background starts with Bloom Boutique Speciality Designer Series Paper, which gave me that soft floral border without any extra stamping. A panel of Petal Pink Cardstock sits on top, creating a gentle contrast for the florals to sit against.
Colouring and fussy cutting the florals
The flowers are from Boutique Blossoms, stamped and coloured with Stampin’ Blends, then fussy cut by hand around every petal edge. It’s a slower way to work than cutting a whole panel with a die, but it means I can layer individual blooms exactly where I want them, tucking petals under and over each other for a more natural, dimensional arrangement rather than one flat cluster with a larger white border from the dies.
Foiled leaves
These leaves aren’t stamped or coloured — they’re hot foiled. I used the Botanical Glow hot foil dies to create the silver foiled look onto Peaceful Pine Cardstock. Once foiled, I fussy cut the leaves, sometimes snipping off smaller branches of leaves and tucked them into the Boutique Blossoms flowers.
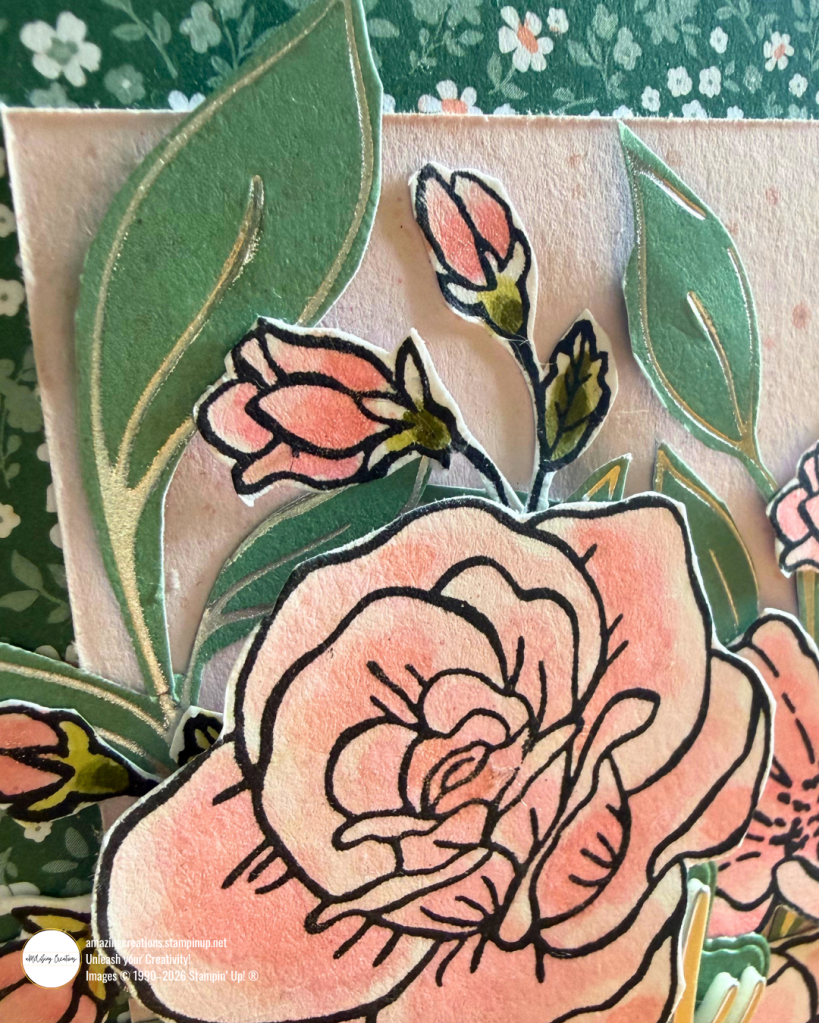
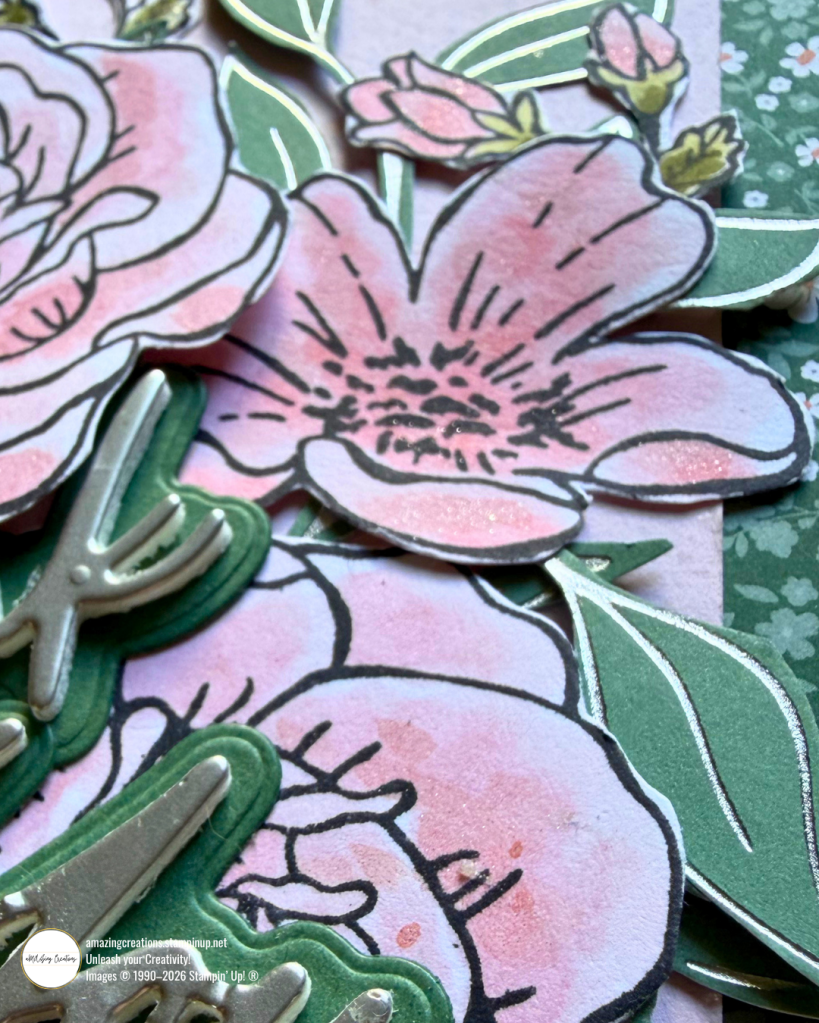
The result is a leaf that catches the light differently to the flowers around it, which adds a lovely bit of visual texture without adding any extra colour to the palette.
Foam Adhesive Sheets — building the dimension
This is where the “layer by layer” part of the title really comes in. The Words & Wishes Dies sentiment was cut from silver foil cardstock, then mounted onto Peaceful Pine Cardstock using Foam Adhesive Sheets, before being placed over the florals.
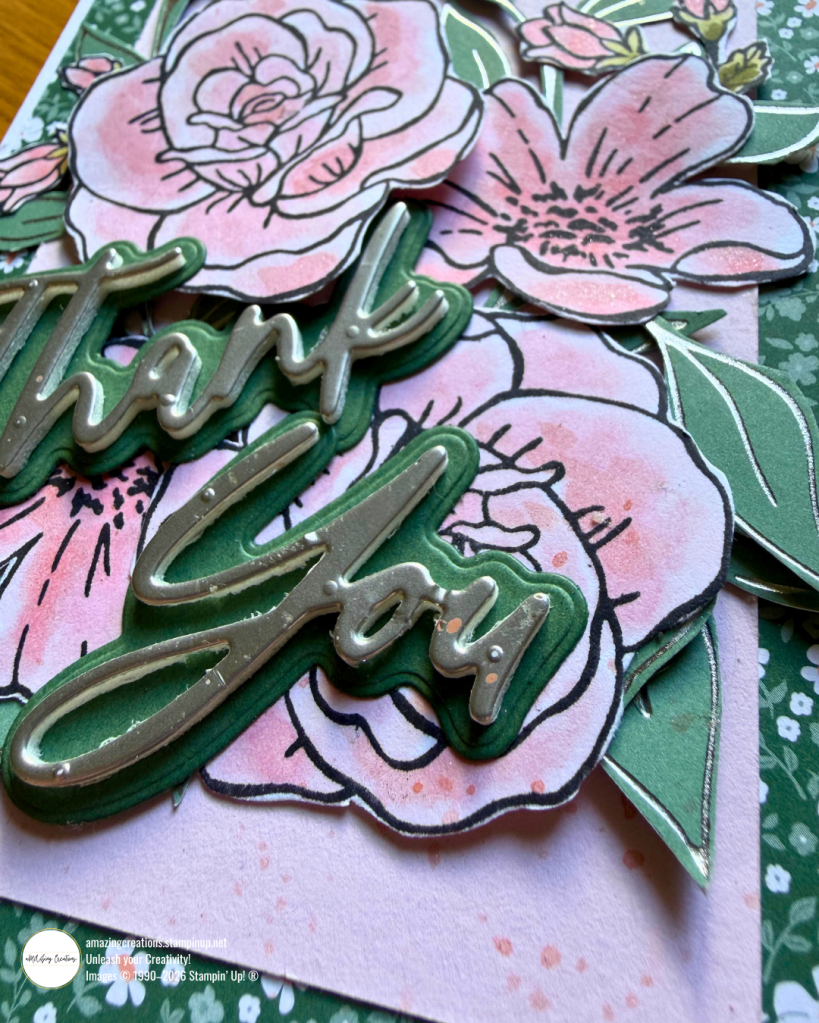
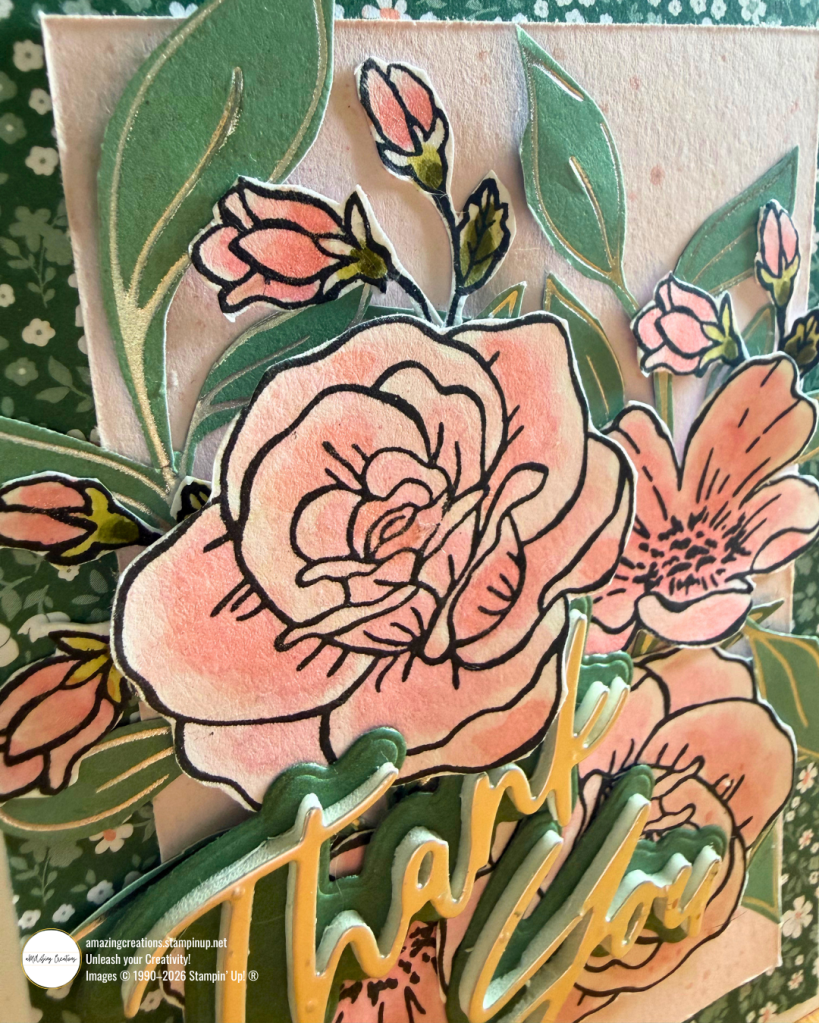
The Foam Adhesive Sheets, is what does the real work here — it lifts the sentiment physically off the surface of the card, so it casts a soft shadow and sits proud of the flowers beneath it, rather than looking pasted flat on top. It’s a simple product, but it’s the difference between a card that reads as “busy” and one that reads as “dimensional.”
The finishing touch
To pull it all together, I added a scattering of Crisp Cantaloupe Shimmer Brush across the card front — just enough to catch the light and echo the warm pink tones in the florals without competing with the foil.
Why layering is worth exploring
You don’t need a fancy fold to make a card feel elevated. Sometimes it’s simply about giving yourself permission to add one more layer than you think you need — a foiled leaf here, a foam-lifted sentiment there — and letting the dimension do the talking. If you’ve got scraps of foiled cardstock or leftover fussy-cut die cuts sitting in your stash, this is exactly the kind of project they’re made for.
See all the details close up
Photos can only tell part of this story, so I’ve also filmed the card so you can see how all the dimension & layers work together.
Remember: Spend $125+ this month = Product of the Month for $9!
What We’re Loving
If you love experimenting with your supplies and trying new ideas, make sure you’re on my email list — I share inspiration, sketches and colour combos.
Unlock Scrapbooking, Cardmaking Tips & Inspiration! Subscribe Today
Til next time, see you soon & keep creating!
Maz



What do you think?