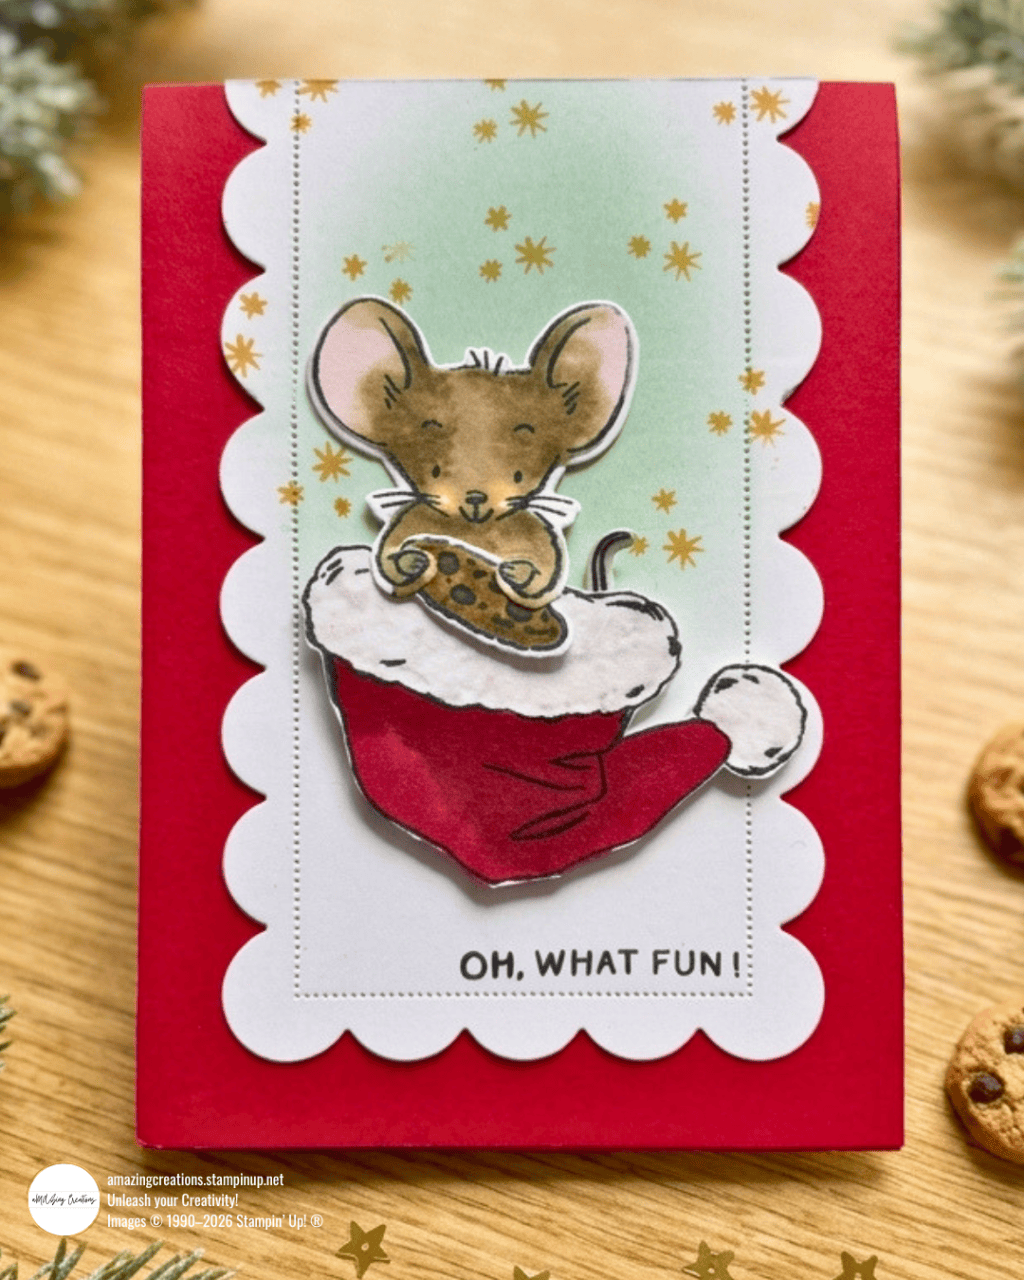
There’s something about a mouse peeking out of a Santa’s hat with a cookie in his paws that just makes me smile — and I had so much fun putting this little card together that I wanted to share the process with you.
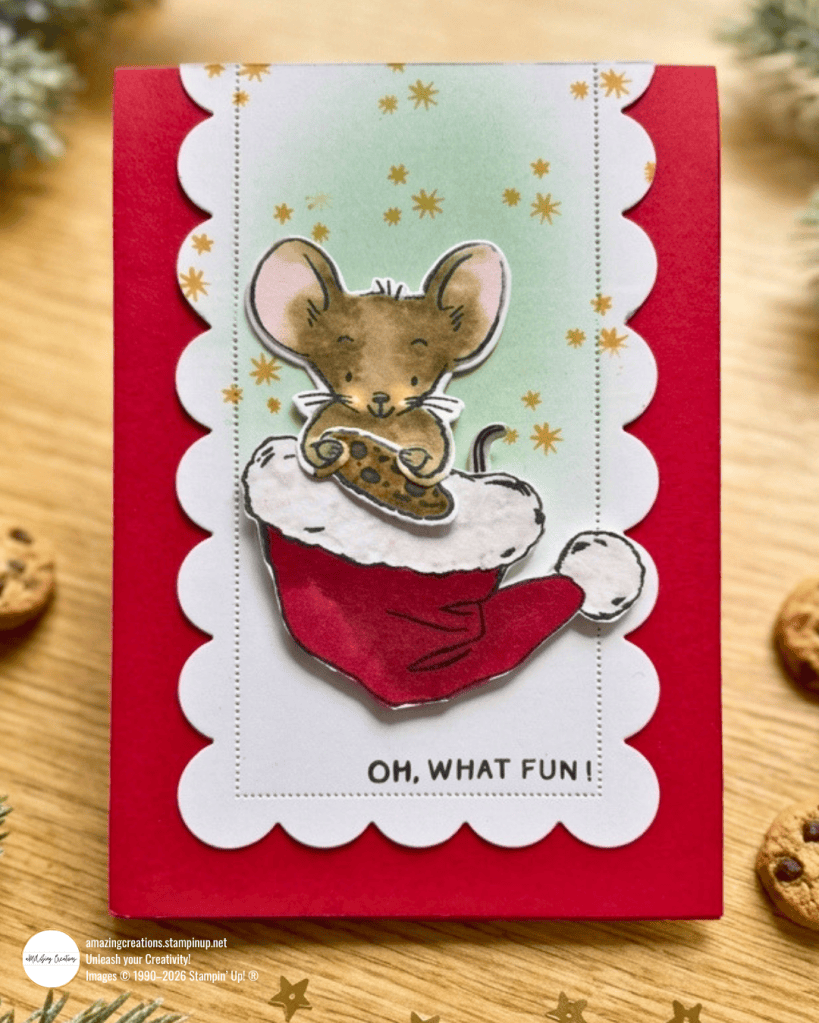
Oh, What Fun – Partial Die-Cutting Technique
The Scalloped Christmas Cheer die gives me the lovely scalloped edges I wanted, but the die wasn’t quite long enough for the panel I had in mind. Rather than settling for a shorter panel, I used a simple partial die-cutting technique.
I positioned the die and ran it through the die-cutting machine, but only part of the die was covered by the cutting plates. I then repositioned the die, carefully lining up the scalloped edge with the first cut, and ran it through the machine again.
Because the cutting plates only apply pressure where they cover the die, only that section is cut. The result is a longer piece with continuous scalloped edges.
Creating the Santa Hat
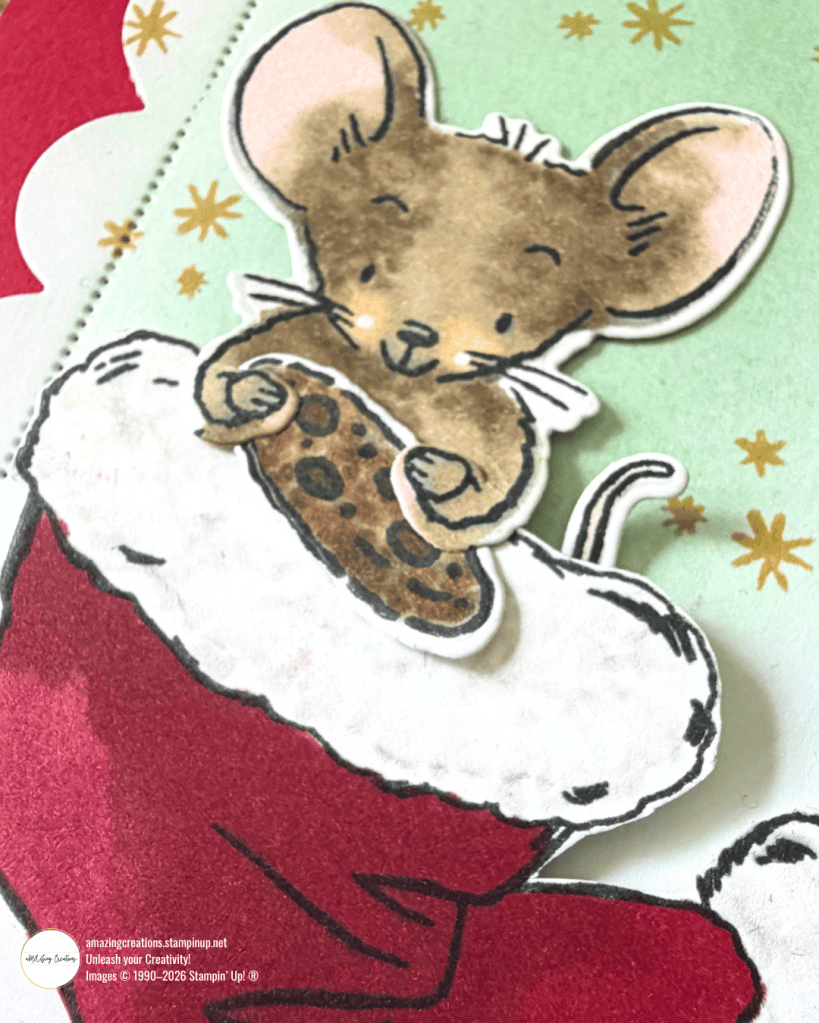
Rather than using the shaded image that is included in the Santa’s Hat Stamp Set to create the colour variation, I decided to colour the hat myself using Stampin’ Blends. There isn’t a coordinating die for the hat, so once I had finished colouring it, I reached for my paper snips and fussy cut around the image.
And then came the fun part…
The Mouse Finds His New Home
This little Christmas Mouse wasn’t actually made specifically for this card. I’d coloured and die cut him during an earlier crafting session and had him sitting ready to use.
As soon as I placed him over the Santa hat, I knew I’d found the perfect combination!
He fits so nicely inside the hat, with his little paws holding onto the edge — it almost looks as though he’s decided that this is where he belongs.
Adding a Little More Colour
Once I had most of the card assembled, I had a little change of heart. The white scalloped panel looked nice, but I felt it needed a little more colour.
So I reached for Peaceful Pine ink and a Blending Brush and softly added colour to the centre of the panel. I didn’t want to completely cover the white cardstock. I just wanted enough colour to give the mouse and Santa hat a little more of a background.
Then I added some small twinkle images using Golden Glow ink. The gold twinkles were just the finishing touch the card needed — especially against the soft green background.
Putting It All Together
With the panel finished, it was time to assemble the card. The red card base gives the project that traditional Christmas feel, while the Peaceful Pine blending and Golden Glow accents add some extra interest. And of course, the star of the card has to be our little mouse with a Mery Mischief cookie between his paws!
I love how a few simple elements — a scalloped panel, a Santa hat, a little bit of blending and some golden twinkles — can turn into such a fun Christmas scene.
Want to see this card come together?
I’ve shared the cardmaking process in the video below, including the partial die-cutting technique I used to extend the scalloped panel.
Mix and match confidently.
This is a great reminder that you don’t need everything from one collection to make a cohesive project. The Christmas Mice, Santa Hat and Scalloped Christmas Cheer Die weren’t necessarily designed as a single “set”, but they work together beautifully. Don’t be afraid to raid your stash and combine products in ways that make sense for your story.
Remember: Spend $125+ this month = Product of the Month for $9!
What We’re Loving
If you love experimenting with your supplies and trying new ideas, make sure you’re on my email list — I share inspiration, sketches and colour combos.
Unlock Scrapbooking, Cardmaking Tips & Inspiration! Subscribe Today
Til next time, see you soon & keep creating!
Maz
 aMAZing Creations
What do you think?